Nosh: Walnut-Chestnut Honey Bread
Ahhhh, Serendipity!I mean, of course, the confluence of fortunate events and not that John Cusack/Kate Beckinsale movie. Considering those are two actors I generally like, that movie? What a clunker. Anyway.So, serendipity. Not too long ago and in all likelihood while I was cleaning out my pantry, my boyfriend spotted our jar of chestnut honey. We had bought the honey at an open-air market while we were on our amazing vacation in Rome (come to think of it, we still have some grappa from that very same market...), but kind of didn't know what to do with it this whole time. I mean...chestnut honey. Do you put that in tea? It seems extravagant, don't you think? Mmmmm, rich, beautiful chestnut honey. Bonus! Honey doesn't go bad--seriously, it will last for years--so it's a great keepsake to pick up if you're looking for something with which you really don't know what to do.Anyway. I was flipping through the latest issue of La Cucina Italiana, a cooking mag I subscribe to and which I highly recommend, when I saw they had an article about how the long periods indoors that cold winter days bring are perfect for making bread. Plus, they included recipes. Cool, I thought. I've been meaning to get back to bread-making...cooking in general, really, since the last month really knocked the wind out of my sails AND I haven't been home much. Then I saw it. The perfect recipe.Walnut chestnut honey bread. Not to put too fine a point on it, but OMFG yes. Toasted walnuts? Always down with them. A reason to use chestnut honey? OK! And since we're facing a looming snow storm, you need extra bread in the house, because I think that's the law. Might as well make it myself.For the record, I don't have the same inclination if a storm warrants that we stock up on milk.And so. Back to the bread. The first thing you should do, regardless of what the recipe says, is start toasting your walnuts. Dry pan, no oil, medium-low heat, give the pan good, solid shakes every so often to and don't leave the kitchen when they're cooking because once they start to toast, they can burn mighty quick. Miiiiiiiiiiighty quick.
 Toasting helps coax out the deeper flavors of the walnut and removes that raw, sort of "waxy" feel and taste that walnuts can have. You don't have to toast them beforehand, but why not take that extra step--which won't take more than a few minutes, and you can do while you measure out the ingredients for your starter--and make sure your food will be as delicious as possible. Be sure to put in extra walnuts so you can snack on them while they cool. Is that just me? It can't just be me.While your walnuts are toasting mix up the starter. The recipe calls this the "biga" which actually means "chariot". Which kills me. I can't get the image of trumpets and fanfare out of my head while making said biga.[youtube=http://www.youtube.com/watch?v=jQNwVKy6H1I]That's some special bread. Toot-tootaroot-toot-toooooo!Anyway. Prepare your chariot.
 Since you're using yeast, which can be killed if the water temperature gets too hot and bring an untimely end to your starter, do be careful with your water temperature. Here's what I did: I took room-temperature water, measured out how much I would need, and put that in the microwave for twenty seconds. Granted, microwaves and starting water temps may vary, and you might not have a thermometer. The inside-of-the-wrist test (like you do with baby formula) works just fine. Mix this all together; it will look a little sludgy and foamy at first, but that's OK, it just means the yeast is waking up. And it tells you to cover tightly with plastic wrap but you know...historically, Italian nonnas didn't have plastic wrap available to them when they made bread in their humble cucinas, so really, don't bother with that. Cover it with a lint-free towel (one that isn't made of terry cloth) and put it in a warm, draft-free spot so it can start its rise. I put mine in the oven. It's protected from drafts, from the cat, it maintains an even temperature. Just, you know. Don't use your oven while your bread is in there (but by all means, use your stove).Once your biga has had its initial rise, mix it with the ingredients for the dough. Two things: if you don't have finely-ground sea salt (or kosher salt), don't be afraid to have at it with a mortar and pestle. And if you don't have chestnut honey, please, don't sweat it. It's a specialty item, and you can indeed find it online if you want, but you can also substitute whatever honey you have handy. Buckwheat honey would provide a similar flavor profile and is easily available, even here in central PA. But any honey that you use in this recipe will be delicious, so don't let that throw you. So mix it all together, turn it out onto your floured work surface and you have something like...
 OK, OK, it sort of looks like a sticky pile of floured brains right now, but hang on, it gets better. Knead the dough. Yes, it will take you ten minutes, but bonus! You get a bit of an upper-body workout. And you don't have to pound the heck out of it, as is popularly misconceived. Fold up the bottom third into the middle, give it a wrist roll. Fold down the top third, give it a wrist roll. Rotate it 90°, repeat. Not the most exciting thing you'll ever do, perhaps. But it works. After ten minutes you'll have a beautifully kneaded loaf of bread.
 Knead in the nuts--which by now are cool, and you've run your knife through and given a very, VERY rough chop--into the bread, and then put that in a bowl that you've coated with olive oil. If you really want to get crazy, coat the bread with some oil, too.
 Then you cover it with your towel, stick it back in your unheated oven (or other appropriately draft-free rising place) and leave it alone for an hour. It will double in size.
 Then you take your risen dough and lay it out onto a prepared baking sheet. Prepared how? Well, all you really need to do is have it in front of you. I sprinkled my baking sheet with cornmeal because it helps maintain non-stickness and I like the texture and flavor it lays down on the bottom crust. But it’s not necessary. Your bread is oiled, it will be fine without any additional tinkering. Lay it out into a loaf. The truly lazy (like me) can opt to hold the dough in one hand and let gravity pull the loaf downward and shape it for you. Whatever works.
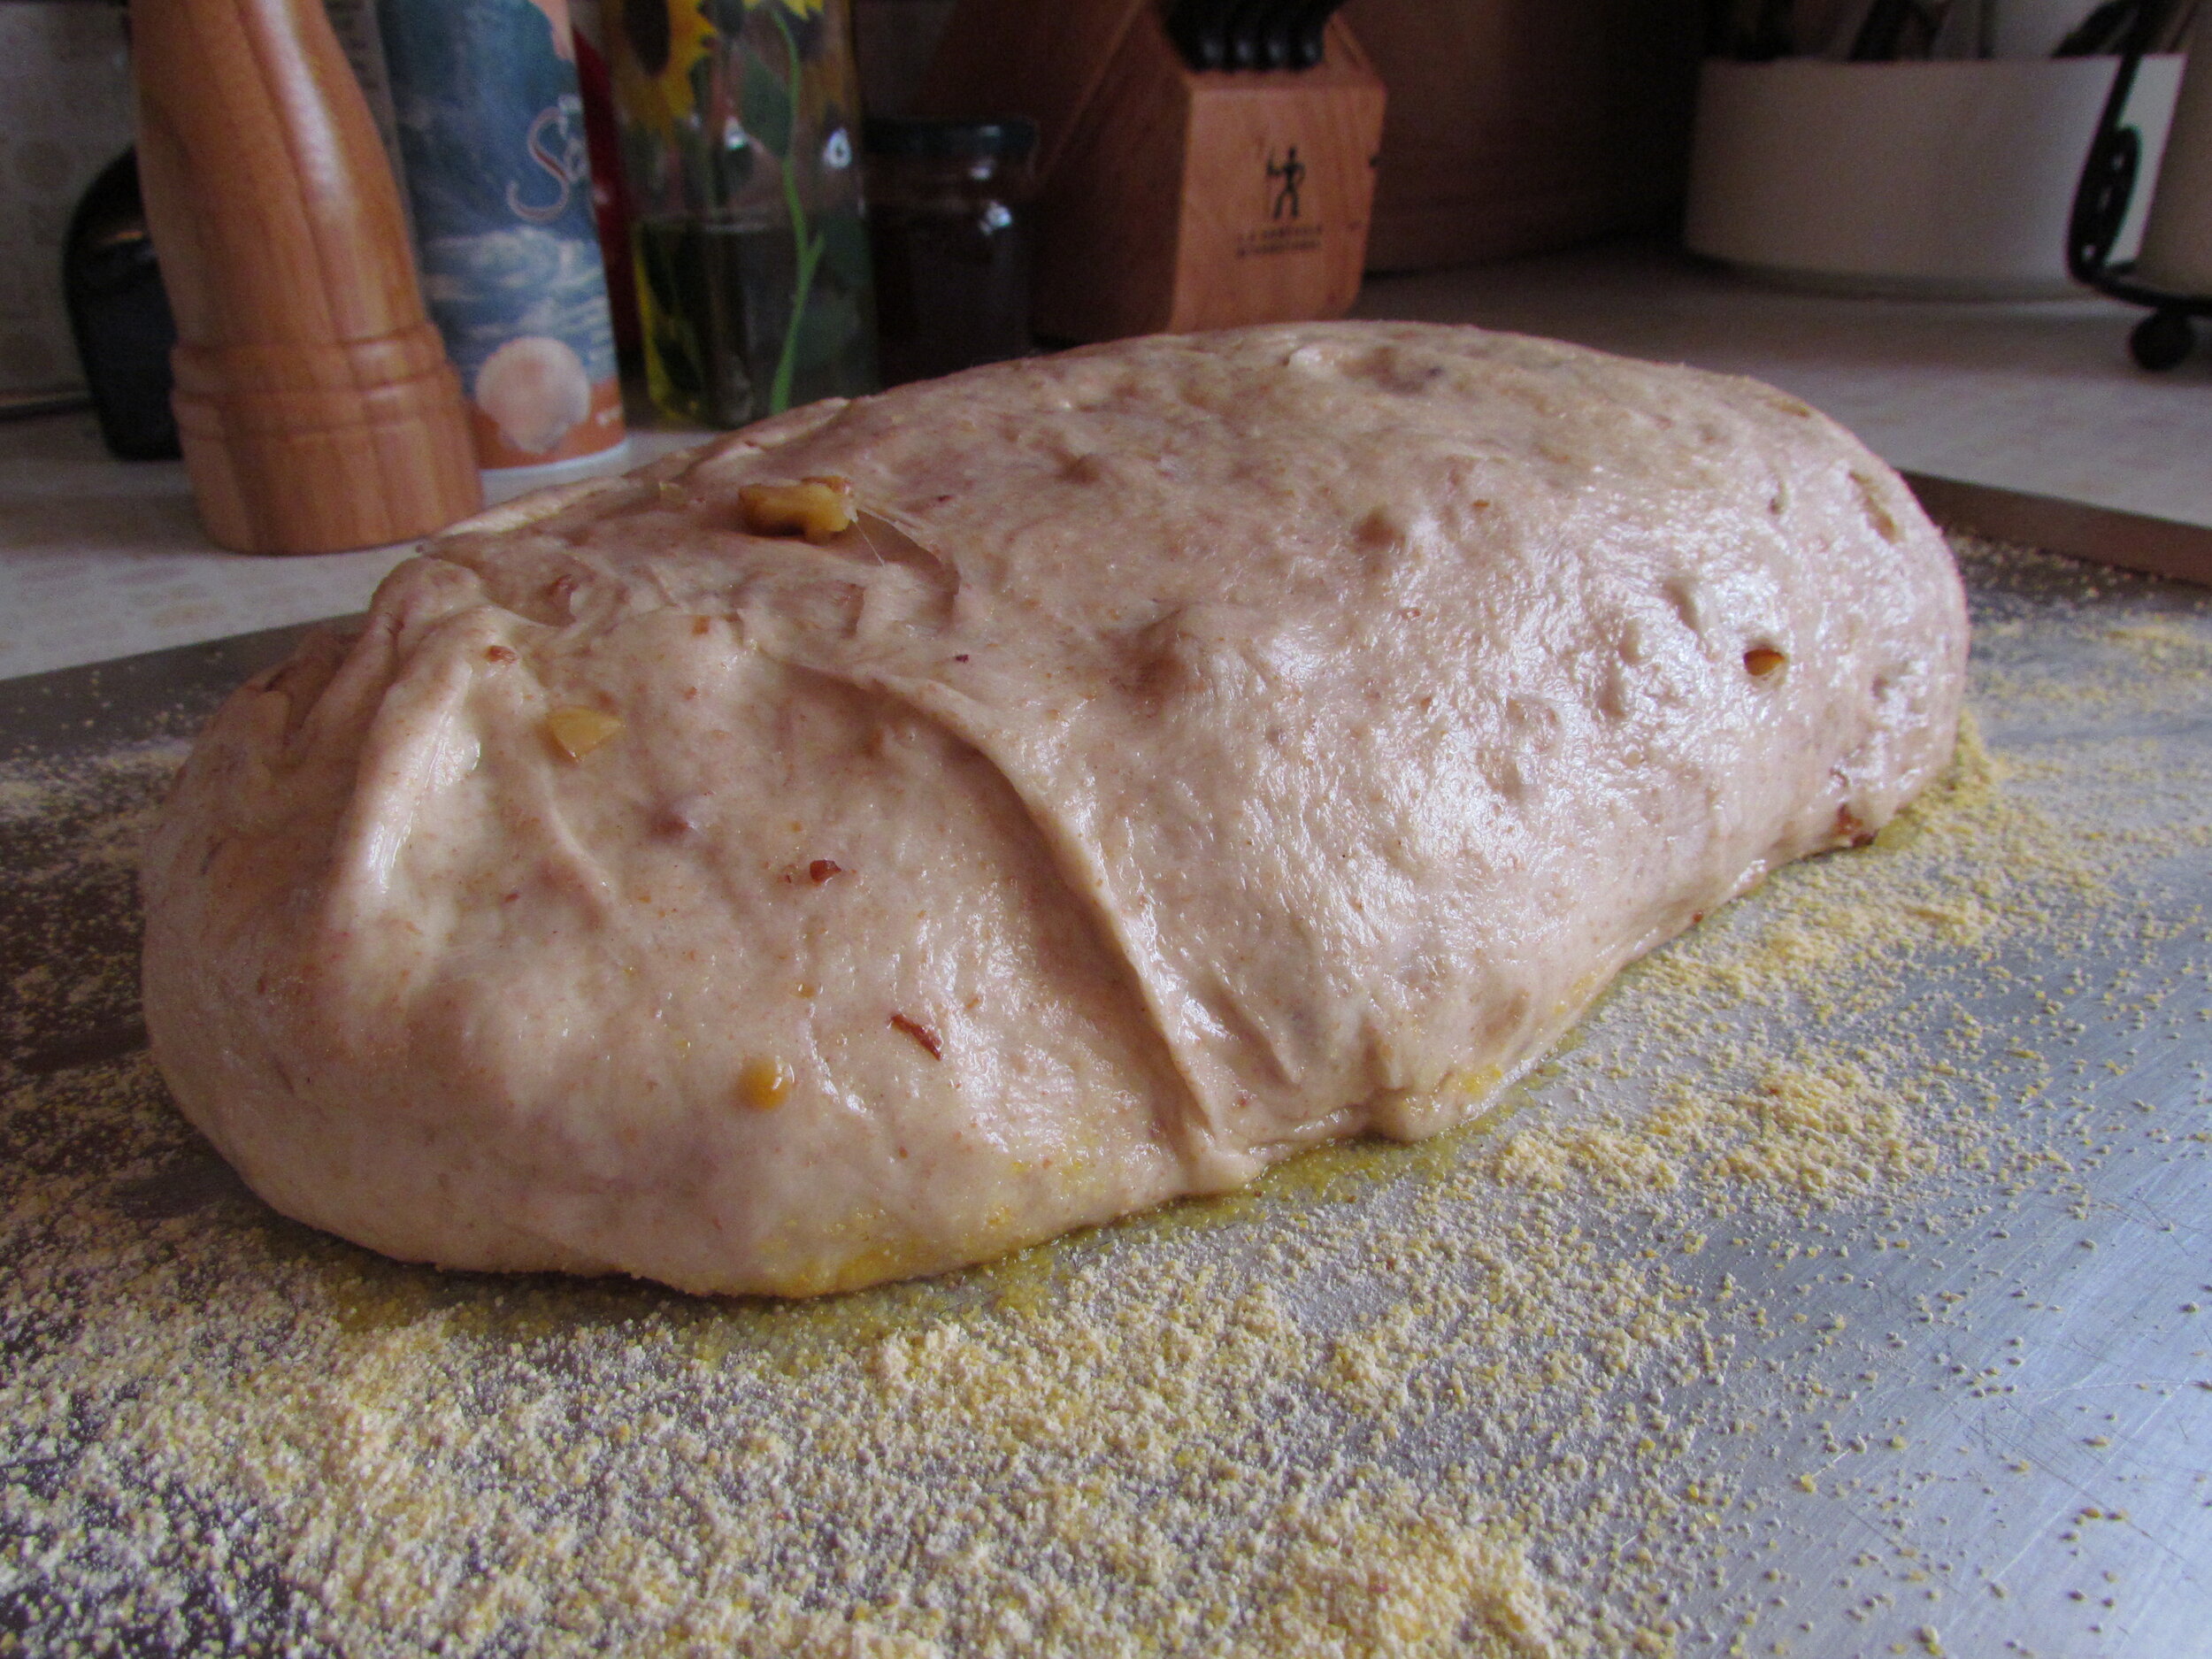
 And then? Towel back over it for a second rise. Yes, indeed, it will rise even more, and after another 45 minutes you’ll have…
 ...A beautifully risen loaf of bread that’s now ready for baking.
 Spark up your oven to 400° and 25 minutes later (rotating once halfway through if your oven, like mine, heats unevenly). The elusive "they" say that your bread will be done if you knock on the bottom crust and it sounds hollow. This is true, and kind of weird-but-fun. Sure, I guess I could stick a thermometer in the bread to check the internal temperature but in the desire to "get to know" my food, I'd rather come to understand what a hollow knock on a loaf sounds like.
 This bread is amazing. It's hearty and chewy and dense, but not as chewy or dense as a bagel. It's adaptable; if you don't like walnuts, use almonds, or pine nuts, or no nuts at all. If you don't have chestnut honey, use whatever type of honey you've got on hand. It won't really matter, it will be delicious any way you make it. And the honeyed perfume will hang in your kitchen and make it smell fantastic, for hours.
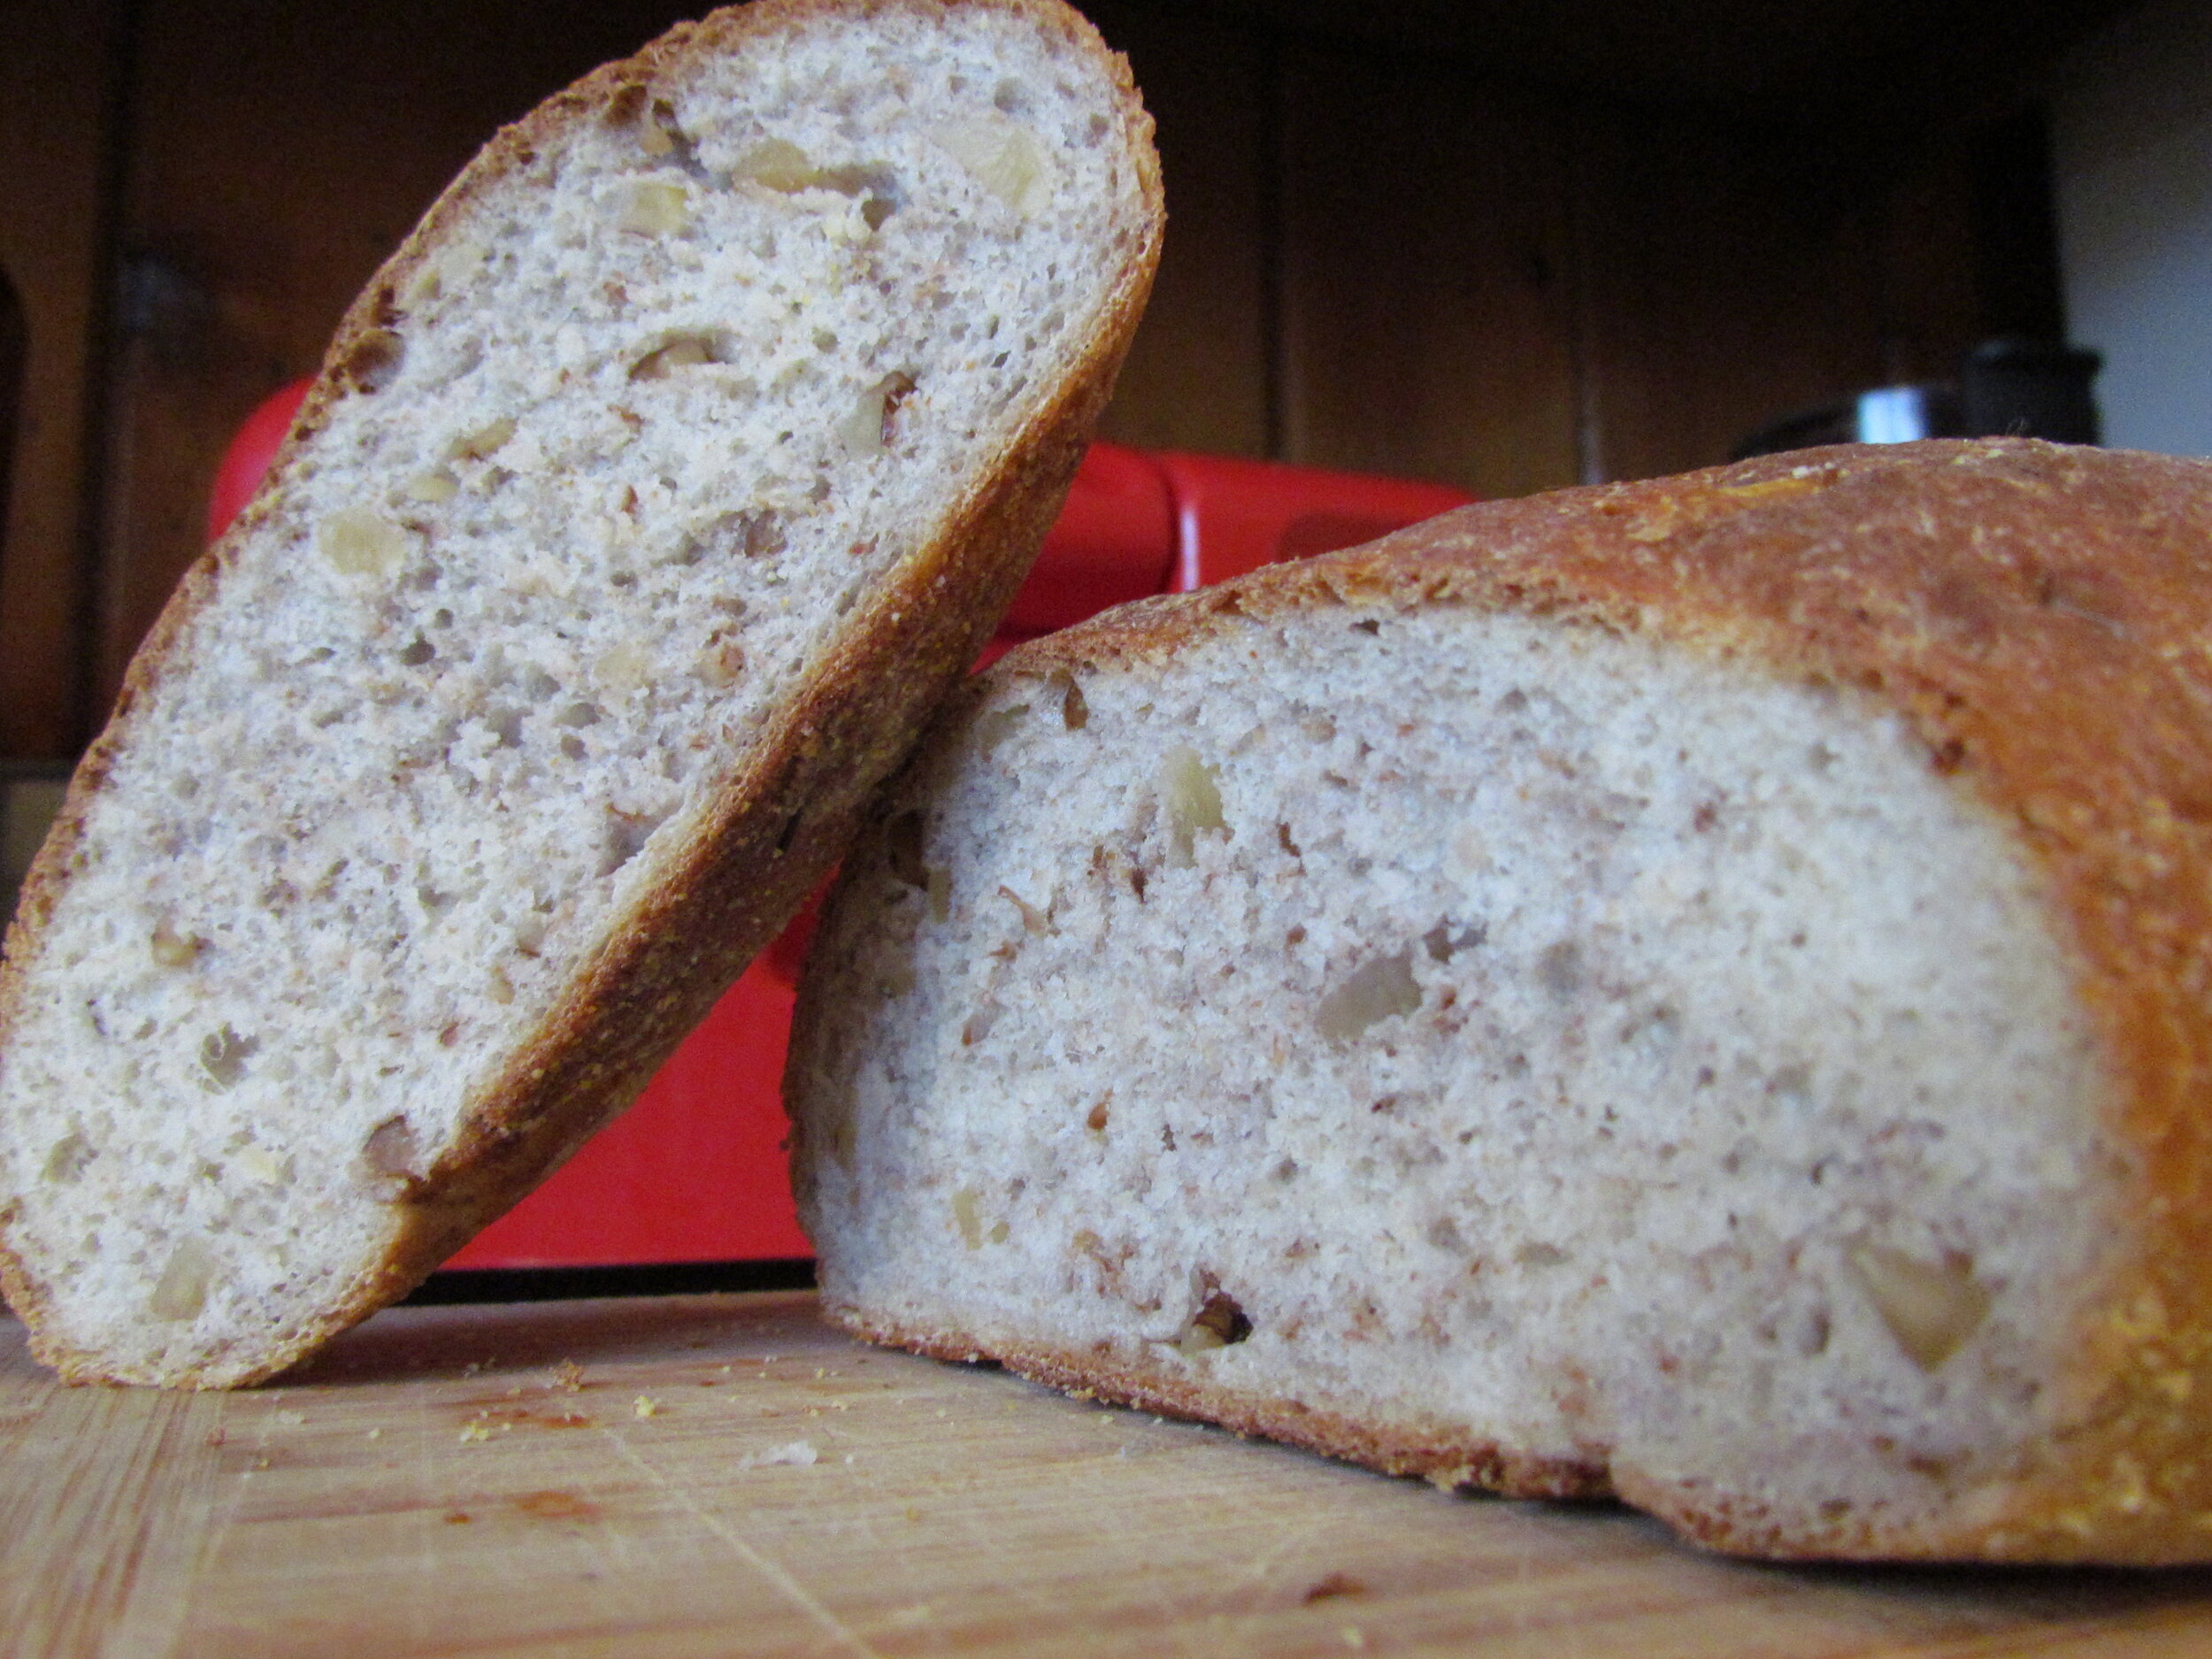 It goes with everything. I've eaten this bread with olive oil, with tomato sauce, with cream cheese and marmalade, and it works every. Single. Time. This bread's not difficult, it just takes some time to put together. It is worth every anticipatory moment. Enjoy!